Tuesday, September 29, 2009

Girlfriend Hello


I found this paper at a local scrapbook store. You probably can't tell, but it's the shimmery, pearly paper by KI Memories. I loved the shoes and purses and the glitter. What can I say? I'm a girly-girl with only little boys to dote on. This is the mini version of Lauren Meader's Keeping Tabs Template. It is the perfect size for the snack size Twix bars. I also created this card with the same paper. I used my new Curly Label punch from Stampin' Up! (I LOVE this punch!). I used a paper piercer to punch around the label, and along the edge of the polka dot paper (my original idea was to sew the paper, but I was too lazy to pull out my sewing machine). I used pop up dots to give the slipper a little extra something. I also heat embossed the sentiment in white. I thought it would be nice to add a little bit of 'bling' - so I attached the mini rhinestones. Now, who to give it to....

Monday, September 28, 2009

Caramel Apple Kit


I have been wanting to make caramel apple kits for the last couple years, ever since I saw one in a my Papercrafting magazine. This year I finally pulled one together. This is a gift for a friend who was so kind as to watch little Sam for me for a few hours one day. I hope she likes it.
For the kit I included a bag of caramels. These are the easy melt balls. I repackaged them in a plastic bag I found in the wedding favor section of the craft store. I attached the 5 wooden sticks that were included in the bag of caramels. I also repackaged some nut topping in a smaller bag. Finally, I included 5 small Granny Smith apples for dipping. Doesn't it just SOUND yummy?
I bought this stamp after seeing a sample on Lauren Meader's blog. I love fall, and I fell in love with these images. I had bought this patterned paper a couple of years ago, but this is the first time I've had a chance to use it. You can imagine my delight when I pulled it out and found that it perfectly matched the Rich Razzelberry paper from Stampin' Up!'s new In Color from the current catalog.
Since the Rich Razzelberry matched the patterned paper so well, I thought I'd watercolor the little girl to match as well. I used the Rich Razzelberry ink pad and a blender pen for her dress. I also used a blender pen with these other stamp pads for the rest of the water coloring: Really Rust, Ruby Red, So Saffron, Red Riding Hood, Basic Black, Only Orange, Old Olive and Close to Cocoa.


Sunday, September 20, 2009

Halloween Treat Bags


I have found youtube to be a valuable source of wonderful, new information. I have learned so much by watching other Stampin' Up! demonstrators' tutorials. Here is one idea I found. I created these easy Halloween treat bags using the Boo to You set (which, sadly, is retired). I found small treat bags (31/2" wide x 6"tall) at the craft store. They had all different colors - a friend of mine is going to be making these as favors for a birthday party.
Here's the instructions: cut the treat bags down to 4 3/8" tall. Cut two pieces of cardstock (front: 4 1/2"tall x 3 5/8"wide) (back: 5 3/4"tall x 3 5/8"wide). Score the back piece at 1 1/4" (this will be the flap that folds over the front). I added a piece of scalloped edged black paper to the bottom of the flap. Then a piece of dotted ribbon over the seam. You can create and decorate any kind of embellishment for the flap. For these I punched the stamped image from a circle and matted it with a scalloped circle I had hole punched (to give it an eyelet lace effect). Attach a velcro circle under the flap to keep closed. I also stamped a "Happy Halloween" to the corner in Staz-on ink.


I added a little crystal glaze to the eyes (googly eyes would've worked great, but I didn't have any.)

Wednesday, September 9, 2009

Open House Projects

This is a sample that will be on display for my Open House.

I'm trying to remember to photograph all my cards and projects so I can share them with everyone. These are my latest. I've been working (almost daily) on preparing for my Stampin' Up! Open House this Saturday. I hope the turn out proves all the work to be time well spent. I only had one pack of Designer Series Paper (DSP) that was from the current catalog, so I used that for nearly all my projects. I really like this paper. I wasn't sure about it by looking at the tiny swatches from the catalog. I've found the swatches in the catalog never seem to do the 12x12 paper justice. I used the new Rich Razzelberry cardstock and ink, along with the Old Olive cardstock and ink.


Here are some of the door prizes. I created four cards, two of each design, and packaged them in clear boxes with envelopes stamped to match.
The pictures don't really show how beautiful the glitter on these butterflies looks.


This is a file folder turned notebook holder. It would look wonderful (and be SO easy) with one of the Thoroughly Modern File Folders. There would be no need to embellish, just create and go.
For the Open House make and takes, I wanted to highlight two easy techniques, rock n' roll stamping, and stamping with markers.

Rock n' Roll:
I have to say, I had a moment of inspiration with this color combination. The first time I tried it, I said "Oh! We HAVE to do this at the open house!". I absolutely loved the way it looked! The colors just say 'fall' to me. This is a small treat wrap, it will contain a cello bag of candies when it's finished. I used So Saffron and Rich Razzelberry for the color combo.

The second make and take is a simple card with 50/50 DS paper. I thought this would be good practice to show how you can color in image with markers before stamping. I colored both images with an Old Olive Stampin' Write marker, and an Orchid Opulance Stampin' Write marker. The three flower stamp, I used the corner of the Rich Razzelberry Stamp Pad (since I didn't have the marker) to color the tips of the flowers for a two tone flower.

Sunday, September 6, 2009

Illusion Necklace


I've decided it's time for me to purchase some kind of necklace stand. After trying to photograph this latest necklace, I found it very difficult to get the full effect, unless it was hanging properly. So that'll be my next Amazon purchase (I've already priced them out :)) . Besides, IF and when I start selling on Etsy, I'll need it. In the mean time, I hope my makeshift props worked. I've decided to restring this necklace, actually. It doesn't seem to hang well, and I wanted to put crimp covers on the crimp beads. When I get around to restringing it, I'll post those pictures.


I used white Swarovski beads and Capri Blue and Aquamarine bicone Swarovski crystals. The tear drop crystals are Swarovski Aquamarine AB. I used round Swarovski spacer silver and Aquamarine spacer beads. I used illusion cord - it's almost like fishing line. You can find everything to make this project on my favorite supply site: www.artbeads.com

L is for...


This is a little book I made for Gene for Valentine's Day a couple years ago. I accordion folded a couple strips of white cardstock, and overlapped them on a fold. I made a little cover out of Taken with Teal cardstock. This was the seasonal patterned paper from Stampin' Up! at the time, although I don't remember the name right now. I actually used a Christmas stamp that said "Peace Love Joy". I cut out the tabs and stamped each letter individually. I didn't have a Taken with Teal marker, which would have worked best for inking just a single letter at a time, but I used a Stampin' Spot, and wiped off anything that I didn't want inked.


I printed words from the poem "How do I love thee? Let me count the ways..." by Elizabeth Barrett Browning. After printing and cutting out the words, I inked them in Taken with Teal and added them on each page of my minibook.

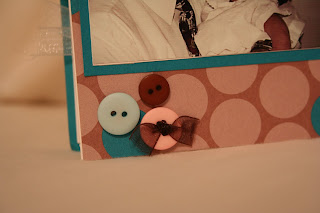
I LOVE putting buttons on projects. Here I grouped three, but only threaded organdy ribbon through one.Here is another time when I used markers to ink a stamp. This image is all one stamp, but I used Stampin' Write markers to ink each flower seperatly. Then I attached a button with a glue dot.